As an Amazon Associate, we earn from qualifying purchases at no extra cost to you.
It’s annoying to hear noises from the room above you. Ceiling allows all noises to come to your room. You will be forced to listen to people jumping or dancing, items falling, pets and children playing, or loud bass vibrating.
However, this should never be the case. You can soundproof your ceiling and eliminate all of these noises.
Therefore, in this article, we will discuss how to soundproof a ceiling without construction
1. Seal the Ceiling Cracks
Cracks on the ceiling will allow noise to pass through it. Despite the material used to construct your ceiling, there are high chances it will crack. The ceiling cracks becomes an issue because they allow noise and air to pass through them.

Therefore, inspect your ceiling. Check any cracks. Sometimes you might not see big cracks. It’s important to be keen when inspecting your ceiling. Don’t overlook small cracks on your ceiling.
Even small cracks will need to be blocked. If not sealed they will develop to big cracks. Also, the small cracks allow air and sound to pass through them.
For a proper inspection, rub the ceiling surface. Clean all dust and check any cracks that you might have missed.
After finding the crack repair them if they are huge. For small cracks seal them with patch seal. The seal is available on Amazon.
Quikrete Concrete Crack Seal Natural 1 Qt
- It is easy to use
- It is highly durable
The seal kit comes with all tools you will need to seal the gaps. It comes with spackle, putty knife, sanding pad, and primer. After using it on your ceiling, the cracks won’t be seen after you paint.
The aim of sealing cracks it’s to ensure that there are no air gaps on your ceiling.
2. Use Soundproofing Blankets
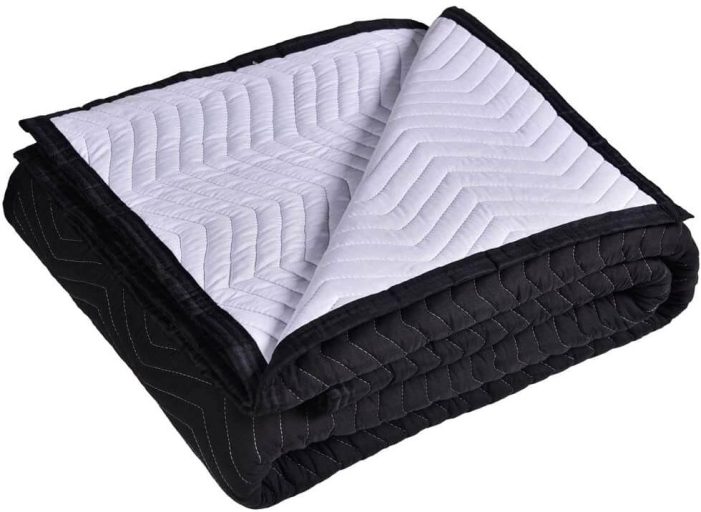
No need to do much construction. Simply, you can use soundproofing blankets to dampen all the noises you are experiencing from the rooms above you.
Pin the blankets on the ceiling. Depending on the type of material used to make your ceiling, use different techniques to install the blankets on the ceiling.
If your ceiling is wooden, use nails to pin the blankets. But if your ceiling is drywall, use glue or other adhesive materials to install the blankets.
For efficiency, cover the entire ceiling with soundproofing blankets. It’s even better if you use more layers of blankets on the ceiling — the denser and thicker the soundproofing materials, the better the soundproofing effectiveness.[asa2_img img=”2″ size=”LargeImage” width=”255″ height=”258″ align=”right” show_title=”no” show_button=”no”]B000TKCXJC[/asa2_img]
Attach the blankets on the ceiling using nails. However, don’t use thin nails. Blankets can easily slide off from the ceiling if you use thin nails. Use a nail with a “fat head” to help the blanket remain secure.
Why Use Soundproofing Blankets on Ceiling
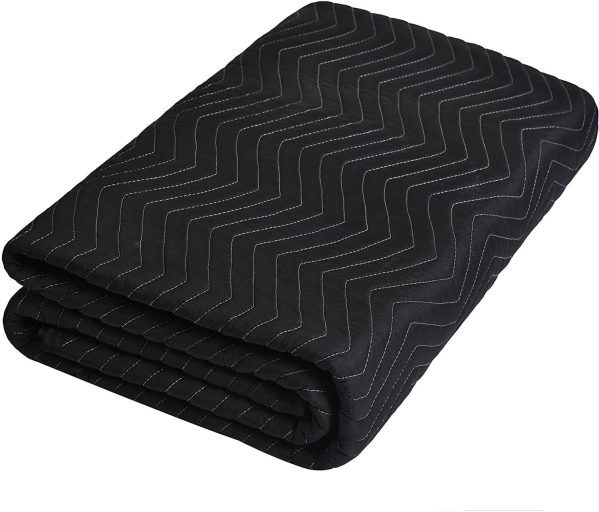
Blankets make a huge difference to the appearance of a room if used correctly. They are a cheap and effective solution for noise. They dampen the air and sound passing through them.
If you stay in a rented house or a student hall you are limited in many ways. You cannot make any adjustments to the room. Also, you cannot take a big soundproofing project. Worst of all, you can’t control your neighbors. Therefore, with all these challenges, blankets become a perfect choice to eliminate all the noise coming through your ceiling.
You could also be eliminating noise from your own premises. It doesn’t make any sense to incur high cost while you can use blankets to soundproof your ceiling effectively.
Blankets absorb and soften sound waves. You will enjoy soft music, and reduce unwanted echoes in your house.
Other benefits of using blankets for soundproofing includes;
- Cheap to buy and maintain.
- Easy to install.
- Flexible to be used on different parts of your room.
Therefore, when you want to soundproof your ceiling fast and efficiently, buy soundproofing blankets from Amazon and install them. They will eliminate most of the noises that you are likely to hear from the rooms above you.
Note: Blankets can absorb dust time over time. If you pin blankets over the ceiling, remember to vacuum them regularly. This will ensure your house does not become stuff over time.
Check the blankets below on Amazon.
Deluxe Moving Blankets by Chean Cheap Moving Boxes
[asa2 tpl=”Flat_box_horizontal”]B000TKCXJC[/asa2]- Size: 72″ X 80″
- Double lock stitching and thick 1/4-inch material
- Ideal for preventing scratches and nicks to furniture
- Double lock stitching with four square finished corners
Sure-Max 4 Moving & Packing Blankets
[asa2 tpl=”Flat_box_horizontal”]B01GK6JRD8[/asa2]- Ultra-thick
- Size: 80″ x 72″
- Weight: 65 lb/dz
- Professional Quilted Shipping Furniture Pads
3. Use Acoustic Foams
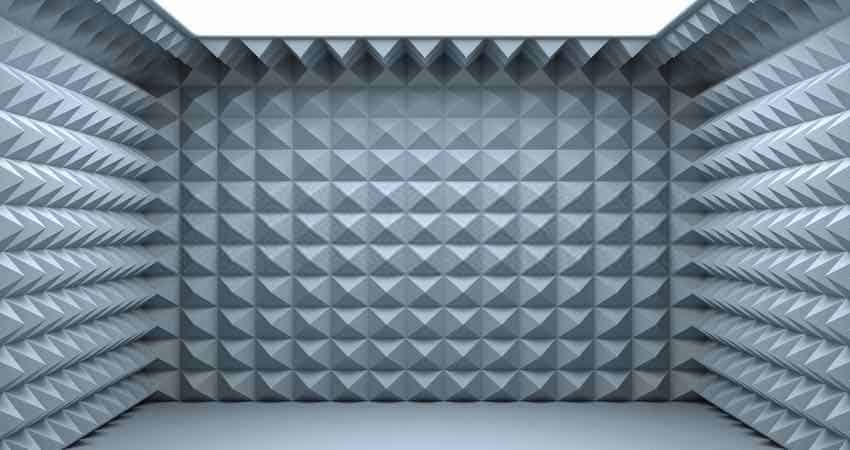
The acoustic foams are specifically designed for soundproofing music rooms. They absorb and dampens any noise passing through them.
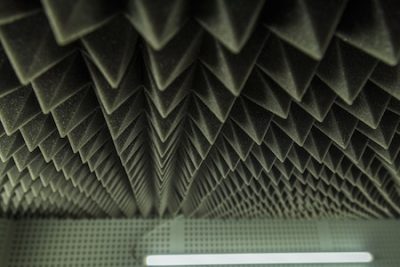
Therefore, if your neighbors are complaining about your bass music, go ahead and pin them on the ceiling. The acoustic foams absorb all nature of sounds passing through them.
They will also eliminate any kind of impact or vibration noises coming from the rooms above you.
The foam mats work as insulators. There is no need for construction when using them. The mats contain rubber foam and are resistant to water, oil, and petrol. They do not allow any air or noise to pass through them.
Unlike blankets, the foams do not absorb moisture or release odors. They are adhesive and easy to stick on the wall.
Acoustic foam panels absorb all noise that bounces off the wall. They soften all the echoes coming from your house.
Therefore, if you are looking for a technique that will reduce all the noises passing through your ceiling, and improve your house acoustic, this is the right technique to apply.
Installation on the Ceiling
You don’t need any special skills or tools to install the acoustic foams. Most of them are self-adhesive. All you need to do is buy and peel off the seal. The next step will be to stick the acoustic foams on the ceiling. And as simple as that, you will have eliminated most of the noises passing through the ceiling.
We have tried and tested the following acoustic foams. They work perfectly on our basement ceiling.
Check our tested foams on Amazon.
Foamily 12 Pack- Acoustic Panels
[asa2 tpl=”Flat_box_horizontal”]B010GPFRUQ[/asa2]- 12 Pack covers 12 square feet
- Professional acoustic control
- Great for spot treating sound on walls
Mybecca 12 Pack- Acoustic Panels
[asa2 tpl=”Flat_box_horizontal”]B00TP7C9YY[/asa2]- 12 pack means
- Professional acoustic control Acoustic
- Sound deadening material
4. Use Dynamat
Dymats are soundproofing mats specifically designed for automotive. Other mats includes Noico and Fatmat. However, as compared to Noico and Fatma, Dynamat is the best to use on ceilings.
The mat blocks and deadens all impact noises. Also, it’s odorless; therefore, as compared to other mats it won’t leave your house with a funny smell.
Relevant resources: Noico vs. Dynamat: Which is Better to Reduce Noise in Car?
Dynamat will absorb all the vibrations and impact noise coming from the room above. Just like the acoustic foams, it will also deaden vibrations leaving from your room through the ceiling.
Installation on Ceiling
Therefore, buy the mat today and install it on your ceiling. Dynamat is self-adhesive. After buying your mat, peel the seal above the adhesive area. Then stick it to your ceiling.
Just like that, you will be able to eliminate most of the noises passing through your ceiling. Buy the either of the following Dynamats on Amazon and say goodbye to soundproofing.
[asa2 tpl=”Flat_box_horizontal”]B00020CB2S[/asa2]- 80 mil 36 sqft
- car Sound deadening mat,
- Audio Noise Insulation and dampening
- Butyl Automotive Sound Deadener.
- 12″ x 36″ x 0.067″ Thick
- Self-Adhesive
- Sound Deadener with Xtreme Door Kit
- Single Sheet, 2 square FT, 24″ x 12″
- Black Aluminum with Self Adhesive (peel off) Butyl Rubber Backing
- Wholesale product, Bulk Packed
- Folded 2 times (into 3rds)
- Includes installation instruction sheet
5. Use Green Glue Between Ceiling Layers
This is a construction free technique. However, it works best when done during the construction of the ceiling. However, even after the ceiling is already constructed it can be applied.
Green Glue is a viscoelastic soundproofing compound that consists of a polymeric formula. It converts sound waves into heat. Green Glue does not act as a sound diffuser, absorber, or deadener. Instead, its soundproofs through sound damping system. It’s normally applied between two different layers of soundproofing materials.

Green glue is eco-friendly and quite non-hazardous.
Therefore, buy Green Glue on Amazon. Apply it on one surface and fix it over your ceiling. Follow the procedure below to use and Install Green Glue on your Ceiling.
Step 1: Get a surface to apply Green Glue
We have already mentioned that green glue can be applied between two surfaces. Get plywood, MDF, or any other flat surface that can be fixed over your ceiling. Use lighter material than your ceiling.
Step 2: Open the Green Glue Tube Properly
The acceptable tip of the green glue should be 1/8” to 3/8” long. However, the size of the tip does not have much effect on the effectiveness of the application.
Step 3: Green Glue coverage
Cover uniformly throughout the sheet. Apply one tube to 4″×8″ area of sheet. The maximum number of tubes you can use in the same area are three. However, we do not recommend the usage of 3 tubes in 4″×8″ area. As you use more green glue, the performance will decrease.
When applying the glue, remember to leave a border of 2-3 inches. This will reduce the chances of getting your hands on the green.
Step 4: Install the Green Glue Surface to Your Ceiling.
After applying your green glue on one surface, screw it to your ceiling. The material should be applied while the glue is still wet. You should not let it dry.
After application, wait for the Green Glue to dry. After it has dried, you will be able to notice some differences. Drying might take up to 15 days.
The following are best types of Green Glue to Buy on Amazon
Green Glue Noiseproofing Compound – 5 Gallon Bucket
[asa2 tpl=”Flat_box_horizontal”]B006FLNS8O[/asa2]- 5 Gallon bucket covering approximately 385 square feet
- Each box comes with installation instructions (in English and Spanish) and datasheets.
- Green Glue is the simplest, most effective, and affordable soundproofing product currently on the market.
- Green Glue is also one of the few products that greatly reduces both impact and airborne noise.
Case of Green Glue Noiseproofing Compound – 12 Tubes
[asa2 tpl=”Flat_box_horizontal”]B000SKWD8Y[/asa2]- Sold in cases of 12 (29oz.) tubes per case.
- Each case comes with installation instructions (in English and Spanish) and datasheets.
- Better results for low frequencies
St. Gobain GGTAPE-1-7|16X100 Green Glue Noiseproofing Joist Tape
[asa2 tpl=”Flat_box_horizontal”]B00MGCRUI0[/asa2]- Take no time at all to install and can be easily incorporated into flooring jobs
- Eliminates Squeaking
- Acts as a form of insulation to improve energy efficiency
Parting Shot
For effective soundproofing solution to your ceiling, combine more than one technique. For example, use green glue and at the same time fix acoustic foams. Depending on the level of noise coming through your ceiling, choose a method and technique that will work well with your situation.

